
DIY Watch dial feet soldering machine, last update 11.05.2026
Tools > Contemporary
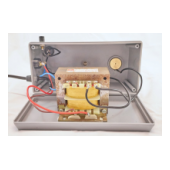
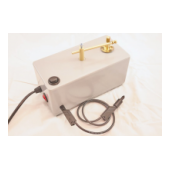
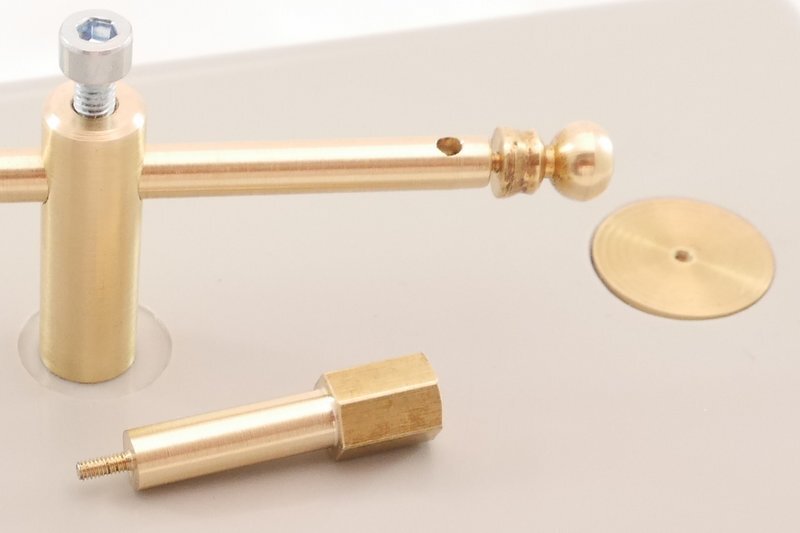
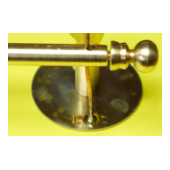
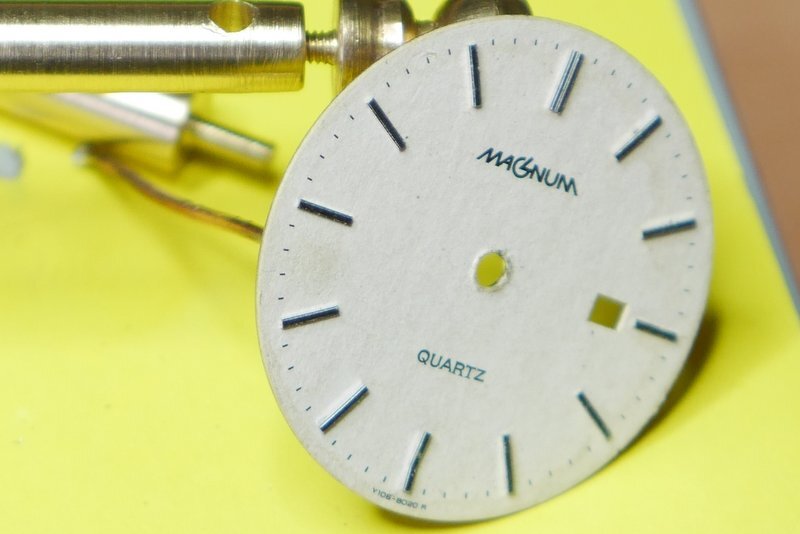
It all started with a PDF file with chapter XX "Dial Positioning For Retrofits" of the book "Repairing Quartz Watches" by Henry B. FriedAfter checking other sites and resources I wanted to make one myself as the price for a ready-made one is 300 $ plus depending on the brand.Project: Dial Feet Soldering Machine on a budget.Items bought add up to 35 € and the rest are out of the odds and ends box.I use an AC transformer, open design, 2 x 6 V as this was available in the local electronic shop. I use only 1 x 6 V as written in the PDF file and shown on the drawing.The carbon rod is from a zinc-carbon battery glued into a little plastic tube and then drilled so that a standard 4 mm banana plug cable assembly can be used.The parts to hold down the dial and the feet positioning arm are made from brass stock I had lying around. The size of the parts is just according to the stock material.For soldering, I use copper wire, "Löthonig" as flux and lead-free 99.3Sn0.7CU solder.To straighten the copper wire fix one side in a vise and hold the other end with a pair of pliers. Give the pair of pliers a good sidewards tap with a hammer. Then cut off the straight part you need.This machine is not for sale and I will not build more. If you intend to solder feet to dials you are able to build a machine like this one yourself.


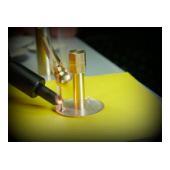

Cleaning the spot for soldering is essential and the the solder paste needs to be properly around the copper wire to give a good joint.
Disclaimer / Build at Your Own Risk
The information on this page is provided for general educational and hobby purposes only. It describes my personal DIY construction of a watch dial-feet soldering machine and is not a certified design, professional instruction manual, or safety-approved product.
If you choose to build, modify, or use a similar device, you do so entirely at your own risk. Working with electrical components, transformers, heat, solder, flux, tools, batteries, metal parts, and small watch components can cause injury, electric shock, fire, burns, property damage, or damage to valuable watch parts if done incorrectly.
Before attempting any construction or use, make sure you have the necessary skills, tools, protective equipment, and understanding of electrical and workshop safety. Follow all applicable local laws, safety standards, and manufacturer instructions for any parts or materials used. When in doubt, consult a qualified professional.
I make no warranty or guarantee that the information, dimensions, materials, drawings, photos, or descriptions are complete, accurate, safe, or suitable for your purpose. I accept no responsibility or liability for any injury, loss, damage, malfunction, or other consequences resulting from the use or misuse of the information on this page.
By using this information, you agree that you are solely responsible for your own work, safety, equipment, and results.
Text extract from the book "Repairing Quartz Watches" by Henry B. Fried
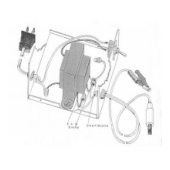
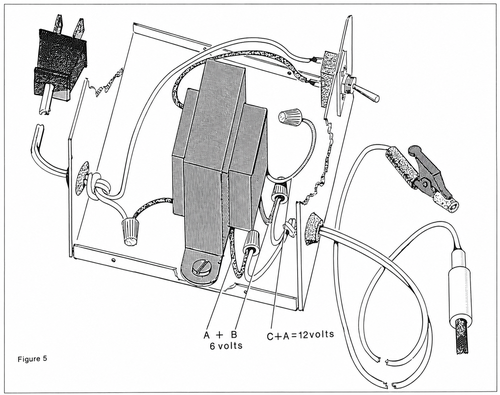 Figure 5 shows a schematic of the entire device. The carbon rod may be had simply by splitting open a spent battery of a “C” cell or an AAA cell. Figure 6 shows these and their spent-cell source. Radio supply stores also have these in all sizes. File the end of the carbon rod to a chisel-edge and a V-slot to provide better contact without slippage. If you prefer a thinner carbon rod, that from an AAA cell is the same thickness as the “lead” in a 2B pencil. To provide good handling insulation, split open a pencil, remove its insides, insert the thin carbon rod, and re-glue the two split pieces. Wrap larger carbon rods with electrical rubber insulating tape. If you’re using a more powerful transformer to attempt hard soldering, a rheostat (variable resistor) in series with the input should help lower the output when weaker current or less heat is desired. .....
..... Ray Vance, president of the Indiana State Watchmakers Institute, made another device for ISWI members (member price: $85). It is rather simple, and, for those who’d like to try, easy to make.
The heart of Vance’s device is no more than a domestic house-bell transformer which, in this case, transforms a wall outlet’s 115 V.A.C. down to 6 volts A.C. One of its leads is connected to a small alligator clip; the other is soldered to the brass cap of a carbon rod. An on-off switch in series with the wall outlet plug at the other end completes the job. A commercially available vented box to hold the unit makes it look quite professional.